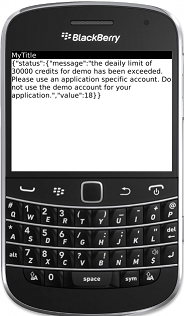
Quick demo
In Blackberry we cannot make a HTTP call in main thread, therefore we need to create separate thread to create the HTTP call.
1. First create a Blackberry application and name it as you want and also give a unique package name.
2. Then create a new class that extends Thread class. I named it as "ConnectJson". No matter you can use your own name.
Here is the code for ConnectJson class.
package com.jcode.json;

import java.io.ByteArrayOutputStream;
import java.io.InputStream;
import javax.microedition.io.Connector;
import javax.microedition.io.HttpConnection;
import net.rim.device.api.ui.component.Dialog;

public class ConnectJson extends Thread {

 private String url;
 public String response;
 private String myinterface = ";interface=wifi";

  public void run() {
         HttpConnection conn = null;
         InputStream in = null;
         int code;

   try {
      conn = (HttpConnection) Connector.open(this.url + this.myinterface, Connector.READ);
         conn.setRequestMethod(HttpConnection.GET);
         code = conn.getResponseCode();

         if (code == HttpConnection.HTTP_OK) {
             in = conn.openInputStream();
             ByteArrayOutputStream out = new ByteArrayOutputStream();

             byte[] buffer = new byte[in.available()];
             int len = 0;

             while (-1 != (len = in.read(buffer))) {
                 out.write(buffer);
             }

             out.flush();
             this.response = new String(out.toByteArray());

             if (out != null){
                 out.close();
             }
             if (in != null){
                 in.close();
             }
             if (conn != null){
                 conn.close();
             }
         }

     } catch (Exception e) {
        Dialog.inform(e.toString());
     }
}

public String jsonResult(String url){
  this.url = url;
  this.start();
  this.run();
  return response;
 }
}
3. In your screen class extend the JsonConnet class and call the jsonResult method passing the URL.
Here is the code for MyScreen class
package com.jcode.json;

import net.rim.device.api.ui.component.LabelField;
import net.rim.device.api.ui.container.MainScreen;

/**
 * A class extending the MainScreen class, which provides default standard
 * behavior for BlackBerry GUI applications.
 */
public final class MyScreen extends MainScreen
{
    /**
     * Creates a new MyScreen object
     */
    public MyScreen()
    {
        // Set the displayed title of the screen
        setTitle("MyTitle");

        ConnectJson connectJson = new ConnectJson();
        connectJson.jsonResult("http://api.geonames.org/citiesJSON?north=44.1&south=-9.9&east=-22.4&west=55.2&lang=de&username=demo");
        LabelField jsonResult = new LabelField(connectJson.response);
        add(jsonResult);
    }
}
This is the code of MyApp class no need to change anything there.
package com.jcode.json;

import net.rim.device.api.ui.UiApplication;

/**
 * This class extends the UiApplication class, providing a
 * graphical user interface.
 */
public class MyApp extends UiApplication
{
    /**
     * Entry point for application
     * @param args Command line arguments (not used)
     */
    public static void main(String[] args)
    {
        // Create a new instance of the application and make the currently
        // running thread the application's event dispatch thread.
        MyApp theApp = new MyApp();
        theApp.enterEventDispatcher();
    }
    /**
     * Creates a new MyApp object
     */
    public MyApp()
    {
        // Push a screen onto the UI stack for rendering.
        pushScreen(new MyScreen());
    }
}
Finally run your application on real device or on the simulator. If you are planning to use simulator to test this on simulator you need to tun on wifi of the simulator (see this).
Thank you!
Happy coding! :)


